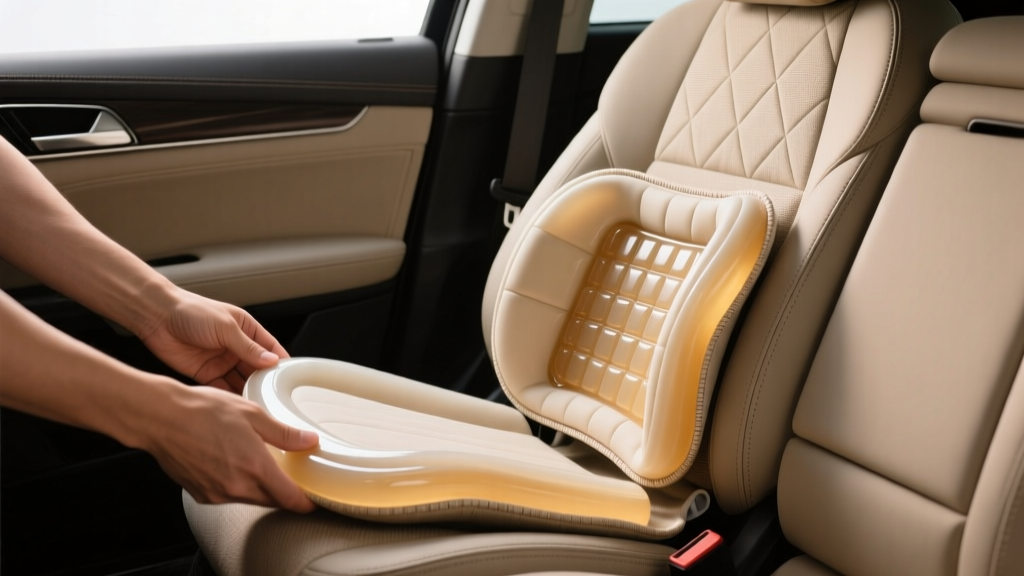
DIY Gel Cushion Replacement: Car Interior Guide (2026)
A comfortable driver is a safer driver. If your seat leaves you shifting around on longer trips, feeling pressure points in your tailbone, or dealing with lower-back fatigue, you?re not alone. Even premium factory seats can feel harsh after years of use, and many sportier seats trade plushness for support. A well-chosen gel cushion insert can bridge that gap?without replacing the whole seat or paying for custom upholstery.
This guide focuses on a specific upgrade: integrating a gel cushion layer inside the seat (or as a semi-integrated overlay), rather than simply tossing a pad on top and hoping it stays put. Done correctly, gel integration improves pressure distribution, reduces hot spots, and can make a daily driver feel more ?grand tourer? on commutes and road trips.
We?ll walk through tools, safety, seat removal basics, different installation approaches (from non-invasive to full cover removal), step-by-step instructions, product comparisons, common mistakes, and a quick FAQ?so you can choose the method that matches your skill level and your vehicle.
What ?Gel Cushion Integration? Means (And Why It Works)
A gel cushion insert is typically a thin layer of gel (often a grid or honeycomb design) paired with foam, fabric, or a breathable cover. When integrated properly, the gel sits where your body needs pressure relief most?usually the sit bones and tailbone area?while still letting the seat bolsters and lumbar contours do their job.
Benefits you can realistically expect
- Reduced pressure points: Particularly for longer drives or drivers with sciatica/tailbone sensitivity.
- Better temperature management: Gel grid styles can improve airflow versus dense foam alone.
- More consistent support: An integrated insert shifts less than a loose cushion.
- Extends seat life: Adding a comfort layer can delay a full foam rebuild.
Two integration paths: choose your difficulty level
- Non-invasive ?anchored overlay?: Add a gel cushion on top, but anchor it under trim, clips, or straps so it looks and behaves integrated.
- Under-cover insert: Remove the seat cover (or partially peel it back), add the gel layer between the foam and cover, then re-secure with hog rings or upholstery clips.
Before You Start: Safety, Fitment, and Planning
Airbag and electrical safety (don?t skip this)
Many modern seats contain:
- Side airbags in the seatback
- Occupant detection sensors (especially passenger seats)
- Seat heaters/ventilation fans
- Power seat motors and memory modules
Basic rule: If you plan to remove the seat or disconnect any connectors, disconnect the negative battery terminal first and wait 10?15 minutes. This reduces the chance of triggering an airbag fault light or worse.
Fitment checks that prevent wasted time
- Seat design: Flat bench seats are easiest; aggressive bolsters require careful trimming and positioning.
- Insert thickness: Too thick can raise your seating position, change steering wheel reach, and reduce headroom.
- Cover material: Leather and leatherette show lumps more than cloth; aim for thinner gel layers under leather.
- Use case: Track/autocross drivers should prioritize stable positioning and avoid inserts that increase sliding.
Tools and Materials
Recommended tools
- Trim removal tools (plastic pry tools)
- Socket set + ratchet (common sizes: 14mm, 15mm, Torx E10/E12, T30/T50 depending on vehicle)
- Needle-nose pliers (for hog rings)
- Hog ring pliers + hog rings (or heavy-duty upholstery zip ties as an alternative)
- Marker/chalk for alignment marks
- Measuring tape
- Spray adhesive (3M upholstery-grade) only if you?re doing an under-cover insert
- Scissors or an electric carving knife (for foam shaping)
- Work gloves and eye protection
Materials
- Gel cushion insert (grid gel or gel/foam hybrid)
- Optional: thin upholstery foam (1/4?1/2 inch) for smoothing edges
- Optional: breathable spacer mesh fabric to reduce heat buildup
- Optional: non-slip fabric or rug pad layer (for overlay installs)
Product Recommendations: Gel Cushion Types Compared
Choosing the right gel matters as much as the installation. Here?s a practical comparison based on real cabin use.
1) Gel grid (honeycomb) cushions
- Best for: heat reduction, pressure relief, daily driving
- Pros: airflow-friendly; distributes weight well; usually durable
- Cons: can feel ?springy? to some; edges may print through thin leather if not smoothed
- What to look for: double-layer grid for heavier drivers; washable cover; anti-slip base
2) Gel + memory foam hybrids
- Best for: a softer feel and smoother appearance under seat covers
- Pros: less bouncy; easier to hide under upholstery; can improve comfort on firm seats
- Cons: warmer than open grid gel; foam can compress over time
- What to look for: high-density foam; ventilated channels; moderate thickness
3) Medical-style gel pads (flat slab)
- Best for: targeted relief on specific pressure points
- Pros: very effective for tailbone sensitivity; thin options available
- Cons: less airflow; may shift if not integrated carefully
- What to look for: sealed edges; puncture resistance; thin profile
Practical recommendation: For most car owners, a thin gel grid or gel/foam hybrid in the 1?1.5 inch range is the sweet spot. If you?re integrating under leather, lean thinner and add a smoothing foam layer on top.
Step-by-Step: Non-Invasive ?Anchored Overlay? Integration (Beginner-Friendly)
This method keeps your seat intact and avoids messing with airbags, hog rings, or upholstery seams. It?s ideal for leased vehicles, newer cars, or anyone who wants a reversible upgrade.
Step 1: Position the cushion correctly
- Slide the seat all the way back.
- Place the gel cushion so the rear half supports your sit bones and the front edge doesn?t dig into your thighs.
- Sit normally and check pedal reach. If your knees feel higher than usual, the cushion is likely too thick.
Step 2: Anchor it so it doesn?t creep
- Use existing straps if the cushion includes them. Route straps around the seat base (not around moving tracks).
- Add non-slip backing between the cushion and seat (a thin anti-slip mat works well).
- Optional semi-integration: If your seat has a removable plastic side trim at the bottom edge, you can tuck the cushion cover?s front lip slightly under the trim for a cleaner look. Use trim tools?don?t force it.
Step 3: Road-test and fine-tune
- Drive 10?15 minutes, then reassess cushion placement.
- If you feel pressure at the front edge, shift the cushion back 1?2 cm.
- If you feel too high, consider a thinner gel insert rather than forcing a thick one to work.
Real-world example: A commuter with a firm compact sedan seat often reports numbness in the right leg after 45 minutes. A 1.2-inch gel grid overlay, anchored with straps and a non-slip layer, typically reduces the need to shift posture and keeps the cushion from sliding during seat entry/exit.
Step-by-Step: Under-Cover Gel Insert Integration (Intermediate to Advanced)
This method creates the most ?factory? result, but you must be careful around wiring, seat airbags, and upholstery attachment points.
Step 1: Prep the vehicle
- Park on level ground and open a door for easy access.
- Disconnect the negative battery terminal, wait 10?15 minutes.
- Move the seat to expose mounting bolts (front and rear). If you can?t power the seat after disconnecting the battery, set the seat position first.
Step 2: Remove the seat (recommended for true integration)
- Remove front seat bolts.
- Slide seat forward and remove rear bolts.
- Tilt the seat to access connectors. Disconnect carefully (do not yank wires).
- Lift the seat out?get help if needed to avoid damaging door trim.
Step 3: Identify the upholstery attachment style
Most seat bottoms use one of the following:
- Hog rings attaching cover listing wires to foam channels
- J-channels (interlocking plastic seams) along edges
- Velcro strips between cover and foam (common in newer seats)
Step 4: Peel back the seat cover enough to work
- Remove side trim panels if they block the seat cover edge.
- Unclip J-channels or cut old hog rings (note locations with photos).
- Peel the cover back slowly. If you see wiring for seat heaters or occupancy sensors, stop and reroute gently?never cut or pinch them.
Step 5: Test-fit the gel insert and mark alignment
- Center the gel pad where your sit bones land.
- Mark the foam lightly so you can reposition it consistently.
- Check thickness at bolsters?avoid bulging the seat edges.
Step 6: Create a clean ?pocket? for the insert (best-looking method)
For the smoothest result, you want gradual transitions rather than a hard gel edge.
- If your gel insert has hard edges, add a thin layer of upholstery foam above it as a ?cap.?
- For deep bucket seats, consider trimming the gel insert to keep it off bolsters.
- Use upholstery spray adhesive sparingly to tack the insert in place. Apply light coats?too much can make future removal messy.
Step 7: Reattach the cover correctly
- Re-secure listing points using new hog rings or heavy-duty zip ties rated for heat. Hog rings are closer to OEM.
- Re-engage J-channels fully (they should snap and hold evenly).
- Make sure the cover is tensioned evenly to avoid wrinkles.
Step 8: Reinstall the seat and clear potential issues
- Reconnect all electrical connectors firmly.
- Bolt the seat down to spec (look up torque values for your model).
- Reconnect the battery.
- Start the car and check for airbag or seat warning lights. If a light appears, recheck connectors first.
Real-world example: On a 10-year-old SUV with flattened seat foam, an under-cover gel/foam hybrid insert can restore comfort for road trips without the cost of a full reupholstery job. The key is keeping the insert centered and smoothing edges so leather doesn?t show a ?square outline? in sunlight.
Practical Tips for a Factory-Like Result
- Keep it thin: Many comfort complaints are solved with 1 inch of better pressure distribution rather than 2+ inches of height.
- Mind the thigh support: If the front edge is too tall, it can reduce circulation behind the knees.
- Preserve seat shape: Avoid placing gel into bolster zones?bolsters keep you planted in turns.
- Use photos as a roadmap: Take pictures of every attachment point before removing rings/clips.
- Heat test: After installation, do a 30-minute drive and check if the seat feels warmer than before. If so, switch to a more breathable gel grid or add spacer mesh.
Common Mistakes to Avoid
- Skipping battery disconnect: This is how people end up with an airbag light or accidental deployment risk.
- Covering seat airbags: Never block airbag seams or add thick material that changes deployment behavior.
- Too much adhesive: A light tack is enough. Heavy glue can damage foam and make future repairs difficult.
- Wrong placement: Gel too far forward causes thigh pressure; too far back can push you into the seatback awkwardly.
- Ignoring sensor areas: Passenger occupancy sensors can be sensitive. If your vehicle is known for finicky passenger sensors, consider the anchored overlay method instead.
- Overtightening zip ties/hog rings: This can distort the cover and create wrinkles or premature tearing.
FAQ: Gel Cushion Integration for Car Seats
Will a gel cushion make my seat feel higher?
Yes, any added layer changes height. A thin gel grid or gel/foam hybrid (around 1 inch) usually adds minimal height while still improving comfort. If headroom is already tight, choose the thinnest insert that solves your pressure points.
Is it safe to install a gel insert in a seat with side airbags?
You can integrate a cushion into the seat bottom in many vehicles, but avoid altering areas near airbag seams (typically in the seatback side bolster). If you?re unsure where airbags deploy, use a non-invasive overlay or consult your service manual.
Can I do this without removing the seat?
For an anchored overlay: yes. For under-cover integration: you can sometimes peel the cover back with the seat in the car, but it?s tighter, harder to see connectors, and easier to damage trim. Seat removal is usually safer and cleaner if you?re going under the cover.
Will gel cushions trap heat in summer?
Some do. Open gel grid designs tend to breathe better than solid gel slabs or thick memory foam. If your car gets hot, look for a ventilated design and consider adding a spacer mesh layer to improve airflow.
How do I know if my cushion is positioned correctly?
You should feel support under your sit bones without new pressure behind the knees. After a 20?30 minute drive, you shouldn?t feel the urge to constantly shift. If you do, move the insert slightly rearward or choose a thinner option.
Do I need professional upholstery tools?
Not necessarily. Hog ring pliers make the job easier and more OEM-like, but many DIYers use heavy-duty upholstery zip ties successfully. The most valuable ?tool? is taking clear photos and staying organized with clips and fasteners.
Your Next Steps
Start by choosing your approach: if you want a quick, reversible comfort boost, go with the anchored overlay method and spend time dialing in placement. If you want the cleanest look and most stable feel, plan an under-cover gel insert install with proper safety steps and careful reattachment.
Whichever route you choose, aim for a thin, breathable gel cushion that improves pressure distribution without changing your driving position too dramatically. Do a short test drive, adjust, then commit to a longer drive to confirm it?s solving the problem you set out to fix.
For more hands-on interior upgrades?seat comfort, trim restoration, cleaning, and cabin tech?browse the latest DIY guides on carinteriormix.com.